

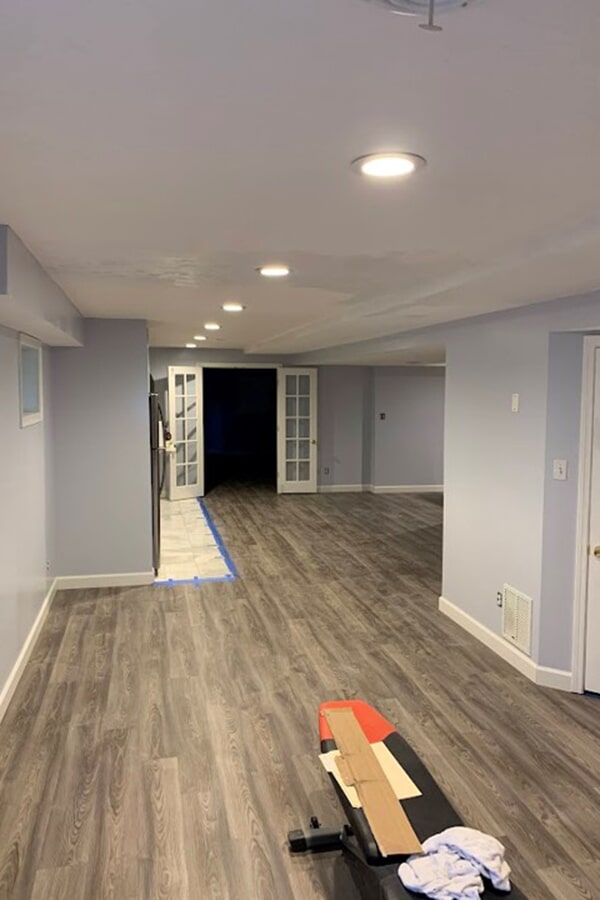
Transforming an unfinished or outdated basement into a welcoming family room, home gym, or entertainment lounge is one of the smartest ways to expand usable living space in Ohio, especially across Greater Cincinnati.
As we all know, our winters can feel long and grey. When January temperatures dip, your lower level becomes the ultimate sanctuary. It is the perfect place to curl up next to a fireplace for family movie night, burn off energy in a dedicated workout space, or gather friends and family to watch Joe Burrow, Ja'Marr Chase and the Bengals win on Sunday afternoons.
However, turning a cold concrete foundation into a comfortable, lasting living space requires careful planning and oftentimes, professional installation. Below grade, temperature swings and natural moisture present challenges that main-floor renovations rarely face.
If you are planning a DIY project, it’s important to know what all is involved before you rip up that carpet or run to your local big box store to buy some flimsy, cheap flooring.
Table of Contents
The Essential LVP Basement Installation Materials Checklist
The Critical Importance of High-Quality LVP (Even for a Basement)
5 Best Practices for Basement LVP Installations
4 Costly LVP Installation Mistakes to Avoid
Leave the Heavy Lifting to the Professional Installers at Cutting Edge Flooring & Tile
The Essential LVP Basement Installation Materials Checklist
Gathering the right supplies beforehand prevents project delays and guarantees your subfloor and planks are properly supported.
Primary Flooring & Prep Materials
Stone Plastic Composite (SPC) Luxury Vinyl Planks: For basement applications, SPC rigid core planks are ideal. The limestone-composite core offers superior dent resistance and dimensional stability against temperature fluctuations compared to flexible vinyl. (Always order 10% extra square footage to account for cuts, room angles, and waste).
6-Mil Polyethylene Vapor Barrier: Even if your planks feature an integrated acoustic pad, concrete subfloors continuously emit microscopic water vapor. A 6-mil poly sheet blocks this moisture from reaching the backing of your planks.
Vapor-Tape (Moisture Sealing Tape): For overlapping seams of your 6-mil vapor barrier by at least 6 to 8 inches.
Self-Leveling Underlayment & Concrete Patch: Used to smooth out low spots, divots, and hairline fractures in your concrete slab.
Concrete Primer: Required before applying self-leveling compound so it bonds securely to the existing slab.
Layout, Measurement & Safety Tools
Moisture Test Kit: Calcium chloride kits or a pinless concrete moisture meter to verify your slab is adequately dry before laying down any material.
6-Foot or 10-Foot Level / Straightedge: To map out high and low spots across the entire basement floor.
Chalk Line & 25-Foot Tape Measure: To establish a square reference line and calculate proper plank widths for your starting and finishing rows.
Pencil & Speed Square: For quick, precise cut lines.
PPE (Personal Protective Equipment): Knee pads, safety glasses, and a dust mask when cutting materials or prepping the slab.
Cutting & Assembly Tools
LVP Guillotine Cutter or Utility Knife: Heavy-duty utility knives work well for score-and-snap methods; a dedicated laminate/vinyl guillotine cutter delivers dust-free cuts right in your workspace.
Jigsaw with Fine-Tooth Blade: For custom cuts around door jambs, support posts, and sump pump closets.
Flooring Installation Kit:
Tapping Block: Distributes hammer force evenly to protect delicate tongue-and-groove locking profiles.
Dead-Blow Mallet: Delivers controlled impact without bouncing or marring the vinyl surface.
Pull Bar: Essential for locking the end joints of planks on final perimeter rows where a tapping block cannot fit.
1/4-Inch to 3/8-Inch Perimeter Spacers: Maintains consistent expansion gaps along foundation walls and fixed posts.
Undercut Saw: For trimming wood door casings so planks slide underneath cleanly.
Finishing Touches
Coordinating Moldings & Transitions: T-moldings (for doorways), end caps (for sliding doors), and reducers (for transitions to utility rooms or bare concrete).
Baseboards or Quarter Round: Covers the required expansion perimeter gap along the walls.
Brad Nailer & Finishing Nails: To secure trim directly into the wall studs or baseplates (never nail trim directly into your floating floor).
The Critical Importance of High-Quality LVP (Even for a Basement)
It can be tempting to view a basement as secondary space and settle for bargain-bin flooring, but below-grade living actually demands the highest grade of materials in your home.
Opting for high-quality luxury vinyl plank makes all the difference:
Rigid Core Stability: Entry-level vinyl is thin and flexible, causing it to telegraph every ridge and bump in your concrete floor. Premium Stone Plastic Composite (SPC) planks feature a dense limestone core that bridges minor subfloor imperfections and resists expanding or contracting during humid Cincinnati summers.
Commercial-Grade Wear Layers: A finished basement sees heavy traffic, dragging gym weights, and moving furniture. High-quality LVP includes an advanced wear layer (typically 20 mil or higher) with ceramic bead coatings that resist scuffs, pet scratches, and heavy daily wear.
Authentic Visual Depth: Cheaper planks suffer from repetitive patterns, unnatural sheen, and fake-looking wood grain. Premium collections utilize Embossed-in-Register (EIR) texture and painted bevel edges to deliver the genuine warmth and character of real European oak or hickory.
Moisture Resilience: Basements are naturally prone to dampness. Premium LVP is waterproof and features engineered locking joints that stay tight, preventing accidental drink spills or entryway melt from seeping between planks.
Investing in top-tier LVP ensures your lower level feels like an authentic, high-end extension of your home: warm, quiet underfoot, and built to stand up to decades of living.
5 Best Practices for Basement LVP Installations
Taking time to handle subfloor preparation is what separates a short-lived DIY floor from a durable installation that lasts for decades:
Test Concrete Slab Moisture First: Ohio basements face significant humidity swings and groundwater pressure. Always test your concrete slab before installation. If moisture emissions exceed the manufacturer's maximum threshold, apply a liquid moisture-mitigation epoxy prior to laying your vapor barrier.
Flatten, Don't Just Level: Floating click-lock systems do not require the floor to be completely level relative to gravity, but they do require it to be exceptionally flat. Standard industry specifications call for a flatness tolerance of 3/16 inch over a 10-foot radius (or 1/8 inch over 6 feet). Grind down high ridges and fill low dips with self-leveling cement.
Always Run a Continuous Vapor Barrier: Never lay LVP directly over bare basement concrete—even when the product packaging labels the planks as waterproof. While moisture will not rot the vinyl plank itself, trapped vapor under the floor creates mold growth and degrades attached underlayments.
Acclimate Your Flooring: Store unopened plank boxes flat in your climate-controlled basement for at least 48 hours prior to installation. This allows the core material to adjust to the room's ambient temperature and humidity.
Stagger End Joints by at Least 8 to 12 Inches: Avoid "H-patterns" or stair-stepping. Staggering plank seams across rows strengthens the overall locking grid and produces a natural, realistic wood layout.
4 Costly LVP Installation Mistakes to Avoid
Skipping the Perimeter Expansion Gap: Rigid core flooring expands and contracts with seasonal temperature changes. If planks are installed tight against foundation walls or structural posts, the floor will bind, peak at the seams, and buckle. Always leave a 1/4-inch to 3/8-inch perimeter gap.
Doubling Up on Soft Underlayment: If your LVP comes with a pre-attached foam or cork pad, do not install a second soft foam underlayment underneath it. Extra cushioning creates excessive vertical flex when walked on, which bends and snaps the delicate tongue-and-groove locking mechanisms over time.
Installing Underneath Heavy Permanent Cabinetry: Floating floors must be free to expand and contract as a single unit. Never install full kitchen islands, wet bar base cabinets, or heavy built-in shelving on top of floating LVP. Install cabinetry directly on the slab first, then trim the flooring around it.
Using a Standard Metal Hammer Directly on Planks: Striking vinyl click-lock edges directly with a metal hammer will crush the tongue and groove, preventing tight seams. Always use a dead-blow mallet against a dedicated tapping block.
Leave the Heavy Lifting to the Professional Installers at Cutting Edge Flooring & Tile
A finished basement provides versatile square footage for your family, but subfloor prep and moisture management require precision to get lasting results.
Since 2012, Cutting Edge Flooring & Tile has delivered superior carpet and flooring sales and installation throughout West Chester, Greater Cincinnati, and Northern Kentucky. As a family-owned business, we take pride in delivering exceptional craftsmanship, personalized floor design support, and top-tier products at great value. Whether you are updating a lower-level living area or planning a full home remodel, our team ensures your project is completed with a long-lasting finish.
Contact our West Chester showroom today to speak with our flooring specialists or schedule an in-home estimate.
Our Service Areas Include:
Cincinnati: Fairfield, Blue Ash, Loveland, Springboro, Florence, KY, Mainville, West Chester, Montgomery, Lebanon, Hyde Park, Wyoming, Madeira, East Gate, and Indian Hill
Northern Kentucky: Villa Hills, KY, Fort Mitchell, KY, Edgewood, KY, Lakeside, KY
Skip the DIY Install and check out this short clip on how we renovated a basement from carpet to LVP:
West Chester Township, OH
Address: 7708 Service Center Dr
West Chester Township, OH 45069
Phone: (513) 647-4829
Cincinnati, OH
Address: 8132 Beechmont Ave
Cincinnati, OH 45255
Phone: (513) 647-4829
About Us
Cutting Edge Flooring & Tile has been providing superior carpet and flooring installation in West Chester since 2012. Our family-owned business takes great pride in providing exceptional customer service and flooring at a great value.
Whether you’re matching a small powder room or an entire floor-plan, our floor design services and installation teams ensure you get the right product for your project. We are proud to serve the Greater Cincinnati and Northern Kentucky Area.


